I'm participating in While Wearing Heels photography challenge for June. This month Amy asked that we share a self portrait with a quote.
I'm now 20 weeks pregnant with twins. This picture was taken at my friend's wedding last weekend where I was a bridesmaid for the first time. I am happy to share it because my hair has been done and so has my makeup, therefore I am feeling a lot better than I usually am at this point. Please excuse the flash partially in my face there are a lot of chandeliers in this New Jersey hotel so they were shimmering everywhere.
Enjoy your weekend!
Pages
▼
Friday, June 28, 2013
Thursday, June 27, 2013
Chalkboard Paint Cheese Plate
One of the first projects I pinned on Pinterest three years ago was one involving painting a cheese plate with chalkboard paint. I had a small plate that generally did not get much use and I thought I would give it a coating of chalkboard paint. At that point it was not easy to find it available anywhere, but I eventually found the Pebeo brand porcelain chalkboard paint.
Just in case you are wondering about this paint coming in contact with food here is the Pebeo's official statement: Porcelaine 150 paints have been given the ASTM D-4236 seal of approval by Duke University, they are completely free of any hazardous materials. They hold the AP Seal of non-toxicity from ACMI and they conform to toy standard 71.3, and are deemed safe for use by children. The Porcelaine 150 paints, outliners and markers contain NO lead or cadmium, they are water based and contain only NON-TOXIC materials. Inadvertent contact with food or drink is not a health hazard. Any decorative or utilitarian pieces may be painted. Paint the exterior of a drink container, and on a dinner plate, it is recommended that you paint around the perimeter of the plate. If you paint the center of the plate, a steak knife or other utensil could damage your design. If a painted design becomes damaged by a sharp object, rough edges may be left on the surface. It is not approved for food or drink containers.
Thank you so much for stopping by! Hope you have a great day.
Tuesday, June 25, 2013
Baby Organization
I saw a great idea on Unoriginal Mom via Pinterest that shared how to organize all the paperwork related to babies in one convenient place. I purchased some folders from Amazon and used an file organizer that I already had. This would make a great gift for any expectant family.
I attached the labels creating different categories suggested by Unoriginal Mom.
I cut out some flowers and the text on my Silhouette in light pink vinyl to jazz up the expandable file folder. I created this folder a about two weeks ago so the pink may or may not match the genders of the babise.
You could easily recreate this gift for under $15 for someone that you know that recently had a child or is expecting. I know I am feeling a little more organized already. Thanks so much for stopping by!
Monday, June 24, 2013
Masking Tape Wall Art
I found a frame in my basement that was not being used anywhere at the moment. I wrapped the masking tape around a piece of cardboard in the frame and then added some cut out vinyl from my Silhouette Cameo. This took about five minutes to complete, and will fit easily into the nursery. Right now I'm going to for a gray, white, navy and teal color scheme no matter what the genders are going to be.
Tuesday, June 18, 2013
Nursery Closet
The closet in our middle sized bedroom has mostly been a storage closet for the past five years. I decided it was time to start working on it to become for functional for the soon to be nursery. I need to get all this baby stuff organized before I become to big to even function.

Here is the closet before which had never painted in the five years we have been here, and looking rather sad.
Here is the closet now with a new coat of white paint and a coat of Repose Gray by Sherwin Williams on the wall. I added some white baskets from Lowe's and lined the shelves with them for various baby items or storage needs. I used wooden plaques from Michaels to create labels for the top baskets. I have the them labeled as diapers, wipes, sheets, blankets, toys, and feeding.
I placed my $25 Thrift Store Dresser inside the closet, and took off the bi-fold doors permanently. It does free up some much needed floor space in the room having the dresser in there. Plus, I am going to use it as a changing table as it is the perfect height for that. Now, I just need to find a changing pad cover on Etsy.
Here is another view of the closet:
I have a couple more items I am going to be adding to this closet in the future. Those board books in the black crate will hopefully be on some book ledges on a nearby wall soon. It is a start for now and it definitely helps with organization that is for sure. Thanks for stopping by!
Monday, June 17, 2013
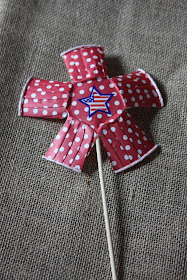
Patriotic Treat Cup Flowers
I was in the mood to create something in red, white and blue for our kitchen. Using a glass pedestal container I had already I placed as with a piece of Styrofoam in the bottom. I covered the Styrofoam with some leftover napkins from the last Fourth of July.
Enjoy your day! Thanks for always stopping by and checking out what I am sharing here at Our Pinteresting Family!
Friday, June 14, 2013
Patriotic Letter Wreath
I traced the letter onto the back of the sheet of moss with a sharpie. Then I applied some glue to the letter and attached the moss after I cut it out.
Using some leftover paper flowers and some ribbon I was able to add a little bit of embellishment in patriotic colors.
I'm hoping that this will be the perfect decoration year round since she lives in seaside town, and this has a somewhat nautical feel to it as well.
Hope you have a wonderful weekend!
Wednesday, June 12, 2013
Hometalk Marvelous Mudroom Projects
In the first month on our blog we shared a Mud Room In A Closet that we built in our entryway. We were without a mud room and had a closet that was constantly disorganized. We made a space that was a lot more organized and efficient for our family. It also opened up the space and made it a lot brighter.
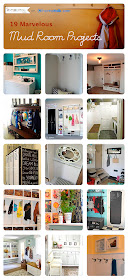
I have created a clipboard on Hometalk that share 19 Marvelous Mud Room Projects! I would love for you to check them out. Hometalk is a fantastic place for ideas and there are people sharing all the time. You can also follow me on Hometalk to see future clips and ideas that I share. Click on the link or image below to see the mud rooms that I have chosen to clip to my board for inspiration.
If you have not had a chance to join in at Hometalk it is simple to do and a fun site to peruse. Check it out! I hope you enjoy the mud rooms that I have chosen to share. Thank you so much for stopping by!
Tuesday, June 11, 2013
A Little {Big} Announcement
We'd like to share some exciting news about our family! Check out this picture....
We were a little overwhelmed at first, but now we are breathing a little easier. Well at least for now. I remember reading the post that Emily A. Clark shared last May about expecting twins and the shock that followed. This means we will be doing some baby related projects and hoping to finish up the projects that we already have going on.I'm not sure what the direction of this blog will be after their arrival. But, we will get there when the time comes. I am just hoping that everything continues to go well, and that we have two more healthy children.
Thursday, June 6, 2013
A Gift for a Bride to Be
I ventured to Hobby Lobby yesterday to get some odds and ends. I wish I had one closer, but the two around me are about 45 minutes in each direction. I have a little get together tomorrow in honor of my friend who is getting married in a few weeks. I picked up this 5 X 7 wall frame for $7.99 on sale. I liked the distressed look and thought it would look nice with a photo from her wedding or her engagement pictures in it.
I had a leftover burlap flower from the package I bought for my kitchen bins. Her wedding is a burlap and lace styled event so the flower fit perfectly. Then a little bit of leftover vinyl was added to include the date. Just a little change to personalize the frame for her. I placed her wedding invitation in it for now, and thought it looked really cute in there. But, for now the blonde girl will have to do for sharing on the blog purposes.
This frame is paired with some wine from the year she met her soon to be husband. I think it will make the perfect little present for her girls dinner tomorrow.
Thank you for stopping by!
Wednesday, June 5, 2013
PBK Inspired Rope Mirror
I have been working on some new wall decor for Wynn's room. I basically got a lot of inspiration from the Pottery Barn Kids catalog as you may have seen in my previous projects. This one also is PBK inspired and took around five minutes to assemble. I saw a rope mirror pictured below and thought it would be a great item to recreate. Here is my mirror for her room:
I had a mirror from Michaels that was pretty inexpensive that I had never used before. I used some leftover rope from my nautical vase project I shared on Monday. I thought about buying thicker rope like the PBK version, but I really did not want to spend any additional funds if I had materials available.
Below is the PBK mirror that I cut out of the catalog as soon as I saw it in there. It is not something that I can find on the site anymore, but I doubt it cost around the eight dollars I spent.
I am hoping to repaint Wynn's room soon, and I will hang her new mirror, seahorse art, and mermaid sign. Thanks for stopping by today.
Monday, June 3, 2013
Rope Wrapped Vase
Little by little I'm creating some projects for the nautical bridal shower that I'm helping to plan with friends. I have had many Dollar Tree vases that have gotten some use for many projects. I ordered some jute rope from Amazon for around 6 dollars, and was able to wrap three vases with it. Then I added a strip of ribbon with poms from a package from the Michaels dollar section.
I've been meaning to fill it up with some flowers and share a picture that way. However, time has gotten away from me the past few weeks and I keep forgetting to do that.
I think they turned out great, and it only takes a few minutes per vase to put these together. It is definitely a cute way to decorate these simple vases.


