Friday, May 31, 2013

Wall Decor for a Buck

I found a framed piece of nursery decor at a consignment sale for a dollar. I liked the frame and decided to snag it for a future project. I figured I would be able to use it in Wynn's room as I adjust her decor a bit.  
I had this piece of scrapbook paper leftover from a previous project. After attaching it to the previous artwork I placed the Silhouette vinyl seahorse on top of it.  I also gave the frame a coating of white paint.

Here is the artwork when I first bought it. It said on the back that it was from Target so I'm sure it was probably between 10-15 dollars if I could guess. I had to cut open the back cardboard of it to get into the frame.  It was very easy to push it back into place after I made my changes to it.


Now I have a new piece of wall decor for a $1.  Can't beat that price!  Thanks for stopping by! I hope you have a great weekend.  It is supposed to be a hot one here in Maryland.


Thursday, May 30, 2013

Burlap Baskets for Kitchen Storage

I picked up some great burlap baskets at the tag sale at Elizabeth & Co in Westminster, Maryland. I was not sure what I would use them for when I purchased them. I just knew that when I saw them in Sharon's preview post of the sale that I had to snag some.  I eventually decided to use them to hold Wynn's snacks in the kitchen.


Just to add a little something to them I added some flower embellishments that I found at Michaels. Now they have a little more personality.  It has been helpful having the treats in the baskets instead of boxes. It saves room in the cabinet too.  We got six boxes of fruit snacks and six boxes of granola bars in these two baskets.


Hope you have a great day! Thanks for stopping by.


Tuesday, May 28, 2013

Pallet Trays

We had a few pallets left in the garage from last summer. I mentioned to Rob that it may be time to find them a new home or put them on Free-cycle.  However, upon returning from Lucketts he decided to start taking them apart and making something new with them.  He decided to make some pallet trays.  Here is what he came up with:

Rob took apart the pallets very carefully.  I used a reciprocating saw to cut the boards off the pallet.  Then he sanded the pieces down with 80 grit and 220 grit sandpaper. Then he cut the boards to the desired size. He stained the brown tray with Cabot's pecan stain and the gray tray with Rustoleum's Sun Bleached Stain.  He also used a 1/2' router bit to create a channel for the bottom boards to sit in. He then used Danish Oil to finish off the stain.

I then found two belts in my "I haven't worn in years" section of my closet. I gave them to Rob and he cut them down to fit handles on the sides.  He attached the belts using roofing nails. See the belts below. I was inspired by this idea by Sawdust Girl as she used belts for her drawer pulls in her garage.

 Here are the belts before they were sacrificed for this project. I think they were last worn in 2004.

Here is another look at the trays. We are going to use them for the deck this summer to hold drinks or flowers. 


Total cost for these two trays was around $3.00. We had free pallets, belts already around the house and purchased one of the stains in a small container.

Thanks so much for stopping by our blog today!

Get Your DIY On

Mr and Mrs. Chair Signs

This year I have three friends who are tying the knot. Considering we have not really been too many weddings recently it is a lot of fun making up small gifts for these ladies.   Once again I made some signs for the bride and groom, and made them in a different way than the previous signs I shared.

I found these chalkboard circles for a buck at Michaels and purchased two. 
Using my Silhouette I cut out the lettering for the signs and small starfish. I used about half of a 12 x 12 sheet of sand colored vinyl.  This is a beach wedding, so I thought that the starfish would be appropriate. I took out the black rope that the circles came with and replaced them with some off white ribbon that I had.
They will be a simple addition to the chairs of the bride and groom at their beach side wedding.

Thursday, May 23, 2013

Patriotic Mantel

I had not really done much with the mantel since Easter and decided it needed a sprucing up.  I took my Cupcake Liner Wreath and hung it in place. Then I went through stuff I already had to add to the mantel.


I put together an empty white frame, a leftover cardboard star and two paper favor bags to create a little piece of artwork.  It was quick and easy. I think I'm going to look at paper favor bags in a whole new way now. I always seem to have a couple extra after each party.  I also added a cute little lantern from Ikea with it on the mantel. It has little star cut outs in it, and so I thought it fit perfectly.


Using the paper cones from my various mantels before I wrapped them with some remaining cupcake liners. Then I placed them on top of tea light stands from the Dollar Tree. I also wrapped some jute twine around a Dollar Tree vase and adhered simple metallic stars to it, and you can see that with the trees in the first picture.

This mantel will surely last me through the beginning of July since there are so many patriotic holidays coming up.   Thanks so much for stopping by here today. I hope you have a great Memorial Day weekend.


Tuesday, May 21, 2013

New Paint Color

First of all I'd like to say that my thoughts are with those affected by the storms in Oklahoma. It is such an unthinkable tragedy and my heart is breaking for them all.

 In the midst of our kitchen redo we have taken on yet another project.  We had never painted the guest room in our home because the color the previous owners left worked fine for us. They did paint the ceiling the same color as the walls and with one window it always felt dark in the room. With some tips from Cyndy from The Creativity Exchange we decided to try out Sherwin Williams paint in Repose Gray.  We also grabbed some white ceiling paint to get that done as well.


This 14 x 12 room only required a half of a gallon and it covered perfectly. We had not previously used SW paint, but I see us using it a lot in the future. What a great product!


It is a small change but it really brightens up the space quite a bit.   This room will be seeing some major changes in the coming weeks, so be sure to stay tuned.  Thanks for stopping by!


Monday, May 20, 2013

Closet Organization and Lucketts

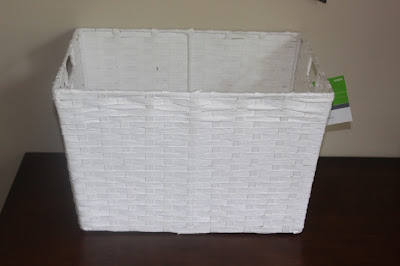
I am in the process of organizing a closet that we have really never used. I purchased some baskets in various sizes from Lowe's. I found they had the best deal for the size of what I was getting. The largest basket I purchased was around $9. I purchased three large and six medium sized baskets. I would have purchased more but I bought all that they had.


A few weeks ago I purchased this small wooden plaque from Michaels. I did not have a plan for it, but decided to use it to label my baskets.  This means I will be heading to Michaels soon to buy plenty more.  I painted it with some leftover paint from a previous project. After it was dry I added some vinyl lettering and attached it to the basket with some jute twine.  


Now, I only have to make about 11 more for the rest of the baskets I'll need in the closet.  
It is certainly a start towards keeping things organized, and especially for sheets which never seem to stay on a shelf very long. 


On another note, yesterday we went to Lucketts, VA for the Lucketts Market. I took a few pictures on my phone. I did get to meet up with some of the Hometalk ladies for a little bit as well. That was very cool!  I also was able to get Marian from Miss Mustard Seed to sign a copy of her book for me. She was so very sweet.  This year we were in and out pretty quickly with Wynn tagging along, but we did get a lot of ideas and saw a lot of wonderful furniture pieces.  

Wynn loved the popcorn and thought that the port-o-pots were beautiful.  That was her first experience seeing one and she loved them. The people walking by listening to her yell "these are so beautiful and just my size, Mommy" certainly got a kick out of that one.

Wynn insisted that we buy this to wash our dogs in.  Unfortunately I don't think it would hold 175 lbs worth of pups.
 I really loved all the goodies that you could find everywhere you looked.
These stools from Ekster Antiques were so pretty!
 Wynn really wanted one of these metal W's. I think that she has quite a few w's already.

Hope you have a great one! 

Tuesday, May 14, 2013

Kitchen Progress

It may seem that our kitchen project is taking a long time, and there are a few reasons why that is true. The first being that we both work full time jobs and secondly we have our sweet Wynn to entertain when we are home. The fact that we didn't really lose any function to it when we tore many of the pieces out means that we do not have to rush. 

He completely built this himself to mimic and inspiration photo I had found.  The bottom right door is where my mixer is being housed. We plan on adding some bin pulls to it to resemble two drawers.  The bottom left may become two drawers, but he is still up in the air with that.

The middle will remain open and an additional shelf will be placed near the top. We thought about making that a cabinet too, but decided against it so that it would not be too dark. There are three shelves in the larger cabinets.

The cost for this section was around $150. There was about $50 spent just on hinges that are hidden inside the cabinets.  Then the pulls were around $30. All other materials wood and paint was around $70. We hope to add molding at the top and put the back splash behind the open shelving.


If you had not seen or had forgotten here was the before of the same space in our kitchen.  It has definitely gotten a lot of love recently. That is for sure.  Thanks for stopping by!


Monday, May 13, 2013

Patriotic Cupcake Liner Wreath

This coffee filter wreath is the wreath that keeps on giving.  I first created the wreath for a spring and summer design.
I removed the embellishments and created a Valentine Wreath with some simple hearts added instead.

This is the next version I have created. I figured that this wreath could go from Memorial Day to July 4th.  I had some cupcake liners that I bought for less than a dollar at Jo-Ann Fabrics last summer.  I added the the liners by wrapping them every few inches around the wreath.


I still have plenty of liners leftover in the package to actually use for cupcakes.  I had some leftover star decorations from the Dollar Tree and I attached those where the hearts and previous fabric flowers were placed.  Thanks for stopping by!

Thursday, May 9, 2013

Pottery Barn Kids Life Preserver Knock Off

Once again I am back with another Pottery Barn Kids knock off.  With an upcoming nautical themed bridal shower in the works I was able to find many decorative ideas in the catalog.  The Pottery Barn version goes for $69 and an additional fee may be paid to personalize the life preserver.


I thought about what I could use in order to create a knock off, and decided to head to the Dollar Tree. I bought an inner tube in a shade of blue for you guessed it one dollar.  Then I took some scrap fabric and frayed the edges of it.  I wrapped four strips around the tube to resemble the PBK version.


Here is the finished knock off:

Not bad for a $1! I am going to make a few more for the party, and also personalize one with the bride and grooms initials. But, I wanted to keep that part as a surprise.  Thank you for stopping by!


Wednesday, May 8, 2013

Wedding Chair Signs

Before I begin let me say Happy Birthday to Rob! We are finally the same age again since I'm three months older.

I made a set of signs for my friend's wedding chairs.  I had seen so many ideas on Etsy and Pinterest and thought I would make some for her.  I had these plywood banner from Hobby Lobby which were $1.60 a piece.

I painted them white and added some wrapping paper to the center of the plywood banner with some Mod Podge.  The wrapping paper came from where else the Target dollar spot.


I added a Mr. and Mrs. to each that I cut from some Silhouette vinyl.  Then I added some lace at the bottom and jute ribbon to have it hang from the chair.  Thank you for stopping by!


Monday, May 6, 2013

Lantern Gift for Mother's Day

If you know me you probably know I enjoy giving gifts in something other than wrapping paper or a gift bag. When I saw this lantern at Marshalls I knew it could house a gift idea inside. Instead of the traditional candle I enclosed some Maryland related goodies.  I added an anchor that I cut from my Silhouette to the back panel of glass. The best part is that this is easily removable if the anchor does not fit a particular decor.

I cut out several crab shapes on the Silhouette and added them to wooden crab knockers, a jar of Old Bay seasoning, and an envelope that has a gift card to a local restaurant where the my mother-in-law can pick up a bushel of crabs.

Here it is all packed up and ready to head to go.  I hope that my mother in law enjoys the gift. I know that I am in the mood for some crabs sometime soon. It certainly is one of the best warm weather activities I look forward to taking part in.
Thank you for stopping by!

Friday, May 3, 2013

Pottery Barn Kids Knock Off Mermaid Sign

I really got inspired when I received the most recent Pottery Barn Kids magazine. There are some things that I do end up buying from there (usually on sale), but I do like to create some of the adorable kids decorations or items that they have to offer. I made this mermaid sign for Wynn's room with a wooden plaque from Michaels, some white vinyl adhesive, turquoise paint from a previous project and my Silhoutte machine. 
 
I painted over the plaque that was around $6 if I can remember correctly.  I went through the images I had previously purchased through Silhouette and picked out an arrow and starfish for the sign. I typed up the wording and cut everything out on a pretty small piece of vinyl, and there was not a lot of waste.  The plaque is approximately 12 inches by 6 inches.


Here is the piece from PBK that runs about $29 plus s/h.  I like how their sign has individual boards glued together, but I was in a time crunch and I already had the wooden plaque in my basement.  That way I did not have to purchase something new.
 
My version was around $8 dollars compared to the $29.  I am hoping to put this is in Wynn's room as I change up the decor in there a little bit.  Hope you have a wonderful weekend.


Thursday, May 2, 2013

Pinterest Power Party

I'm guest hosting today at the Pinterest Power Party! Please link up something you'd like to have pinned.  

Hey friends! It's time for our weekly Pinterest Power Party!

GUESS WHAT!? We've created a Pinterest board for the weekly Pinterest Power Party! Be sure to follow our board here to see which links are featured or just catch our eye each week!

This party is to focus on YOU - the readers! Do you have a DIY project, frugal gift idea, or delicious recipe you want to share? Well, we want to see them and share them on our Pinterest boards too!!

Sew Much Crafting

So, you're asking...
How do I participate? Easy!
Be a Pinterest Follower of the three hosts as well as our co-hosts!
Heather @ Living on Love and Cents: Pinterest | Blog
Chrissy @ The Taylor House: Pinterest | Blog
Danielle @ Sew Much Crafting: Pinterest | Blog
Deanna @ Gloriously Made: Pinterest | Blog

Megan @ Our Pinteresting Family: Pinterest | Blog

Let's party!! Help us spread the word by grabbing the above button and putting it on your blog! You may link up your favorite projects, tips, recipes, and ideas! Please pin the two links before yours {and any others you like too!!}.

But wait, there's more!! Be sure to stop by next week and see if your link was featured! If you're featured, grab a button and wear it proudly on your blog!

Sew Much Crafting
Would you like to co-host with us? We have openings in some of our upcoming parties for people who would like to join us! Just send an email to Chrissy {cmaetaylor@yahoo.com} to find out which dates are available!
   
Are you ready to party and get your pin on?
Here are the features from last week!
{1} An Organized Freezer from de Jong Dream House
{2} Cinnamon Crunch Bagels from Half Baked Harvest
{3} How to Freeze Strawberries from Turnips to Tangerines
{4} Mickey Mouse Oreos from Busy Mom's Helper

{5} DIY Sofa Table from Let's Get Crafty
{6} Repurposed Can Herb Planters from Cozy Country Living
{7} Lemon Raspberry Phyllo Tarts from Lemon Tree Dwelling
{8} Upcycled Thrifted Lamp from The Happy Housie