Thursday, January 22, 2015

Valentine Printable & PicMonkey Contest

I've created a Valentine's printable for you to print for yourself at home.  I created it using the Delightfully Noted Tutorial that my pal Jennifer has shared. Feel free to print one for yourself and a friend. This is sized for 8 by 10 inches. Be sure to check out the great contest from PicMonkey below. This is a great contest if you like to pin on Pinterest.


PicMonkey is such a fun site to create your own printables or edit photography.  The site is extremely user friendly. Right now they are hosting a great contest in honor of Valentine's Day.  Here are the details...

How to Enter?
  • Follow PicMonkey on Pinterest
  • Create board titled “PicMonkey Pin Your Love”
  • Post a link to your board in the pin shown here: https://www.pinterest.com/pin/170222060891631480/
  • Pin something made with PicMonkey to be eligible to win (You can pin the printable I just shared with you)
  • No minimum number of pins required but go crazy and curate a beautiful board
  • Hashtag all pins #pinyourlove #picmonkey
Who wins?
  • One winner will be chosen based on originality, creativity, and adherence to the rules.
  • Everyone is welcome to participate, but prize eligibility is limited to the United States.
  • Official Rules are here
What do you win?
  • The prize is a $300 gift card to Amazon and one free year of PicMonkey Royale
Three things I love! PicMonkey, Pinterest and Amazon. I hope one of my readers is the lucky winner!

Sunday, January 18, 2015

Egg Carton Valentine Idea

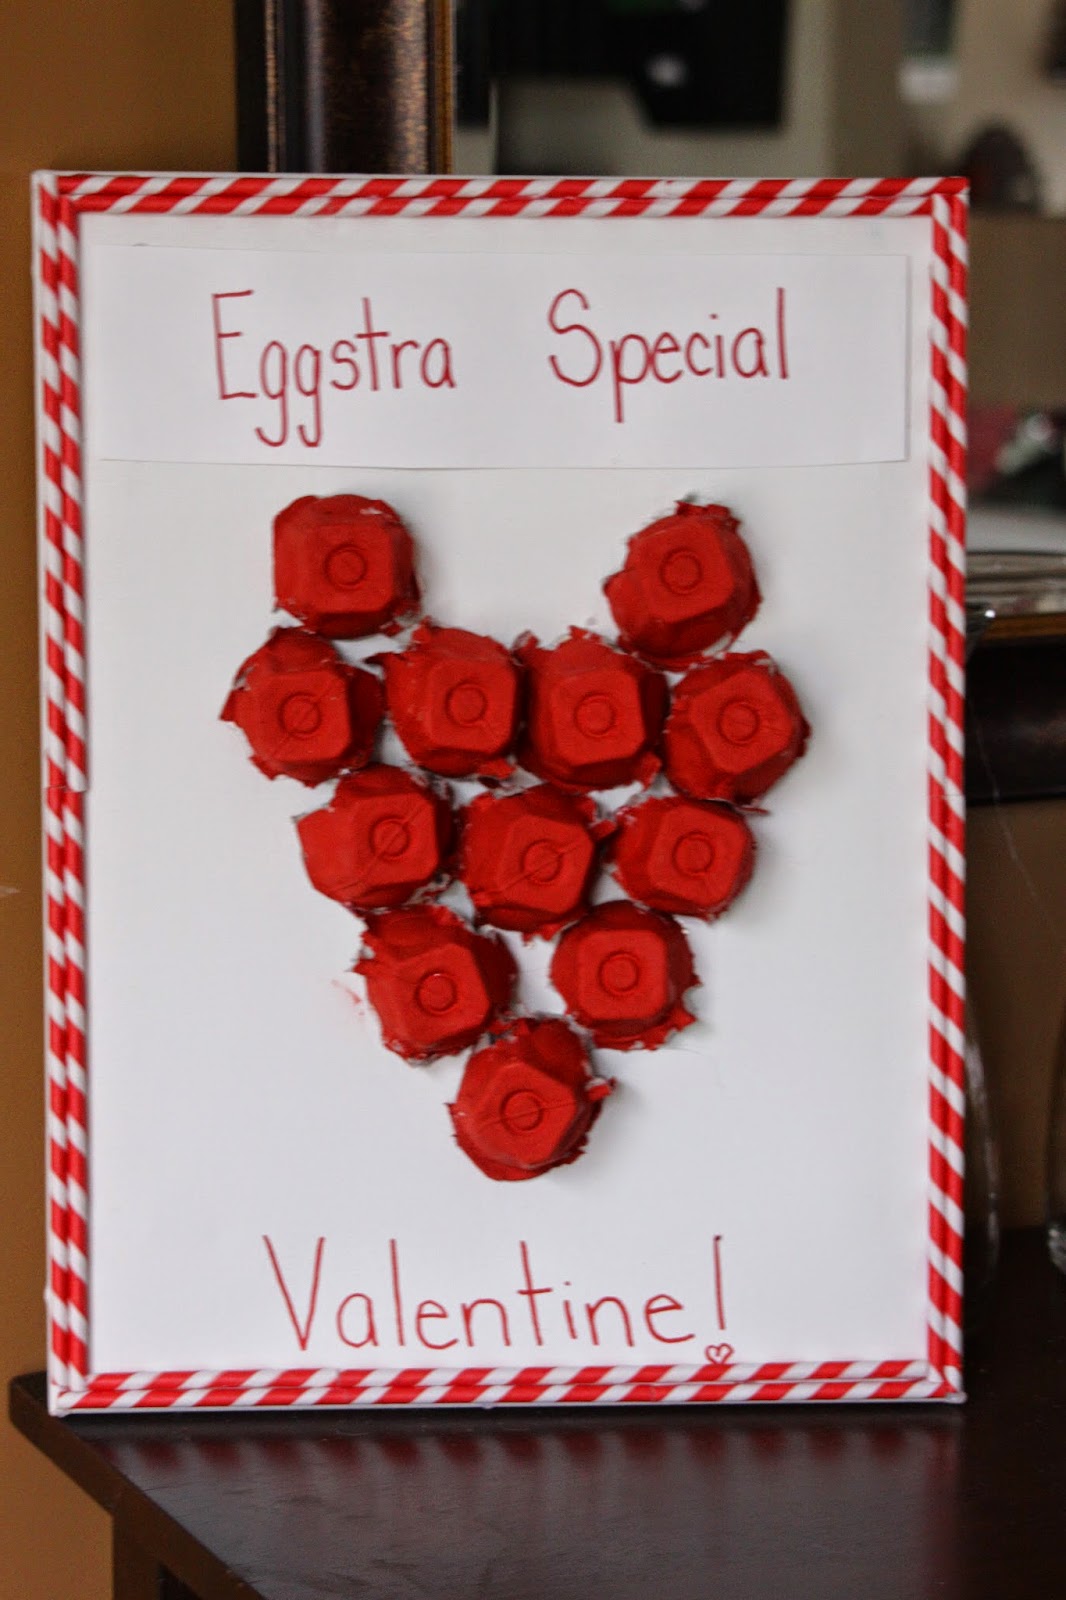
I was scrolling through my Would You Be My Valentine board on Pinterest last weekend. I came across an adorable idea from the blog A Little Hut.  Here is what Wynn and I created. It has been a lot of fun getting crafty on these winter days with her.

We used an egg carton with eighteen sections. It was good to have some extras just in case.  Wynn painted them with red paint, and in hindsight I would have had her cut them first just because it would have been easier for her.

 I put some Kraft paper below so Wynn could get as messy as she wanted with her painting. She even suggested that she may want to wear a smock. That's my girl. Always looking for a way to stay clean. 
 After they dried she used her scissors to cut out the egg carton. As you can see we did not use all 18, and that was good since she had some room for error if needed.  She helped me arrange them on a canvas in the shape of a heart. I showed her the inspiration photo, and then she thought this was perfect. I think it is cute this was obviously cut out by her because she has really been working hard to use her scissors. Apparently being a left handed kiddo makes it a little tougher to deal with them at first.
I hot glued some paper straws around the edge for the border, and then hot glued the egg carton pieces too. I gave a few options for the saying such as "eggceptional valentine", "eggciting valentine", and Wynn liked the "eggstra special valentine".  She told me she would like to give this to her teacher.  It is headed into school with her tomorrow moring.  I love doing projects that recycle items we have headed for the curb.  I am ready to pop back on Pinterest to come up with something for the next couple of holidays.

Monday, January 12, 2015

Frozen Valentine's Day Mantel

I'm throwing a small family Frozen party for Wynn in a few weeks for her fifth birthday. I also enjoy doing a mantel for most of the holidays. I shared my frozen heart project the other day, and added a few more items with it to place on my mantel.


I used my Christmas trees and just got out scrapbook paper hearts, and tied them on.  Then I filled a Dollar Tree vase with fake snow, and a little bit of Easter basket filler for the blue. I put a foam snowflake onto a purple straw.  All items I already had in my house. No need to go and spend money on additional decorations.  Plus, I am really trying to reel in the unnecessary extras in my storage area.  I added some pom pom yarn to the front. I thought it looked like little snowballs. This yarn has been used in many of my projects. I am definitely getting my money's worth with it.

I used my Silhouette Cameo and cut out scrapook paper letters, and vinyl snowflakes. I used the vinyl because I had run out of purple scrapbook paper. I just used a little bit of glue to attach the letters. This is one of Wynn's favorite verses from the movie Frozen, and so I thought it was appropriate for Valentine's Day as well.  I plan on moving it to the front door as a non-wreath door decoration for her party.

Thanks so much for stopping by and checking out my newest mantel. I had a lot of fun putting it together rather quickly. Hope you have a great day!

Tuesday, January 6, 2015

Frozen Inspired Valentine's Decoration

We have a lot coming up in terms of birthdays this month in our family. The primary one being Wynn's 5th birthday. I am working on decorations for her party, and am attempting to keep it to a $125 budget. The big chunk of that budget will be going to food. We are only having about twelve guests (three being one or under), and so I think we will be able to stick to the budget. However, I did not want to spend any additional money on a Valentine's mantel. I decided I would somehow incorporate Winter, Valentine's Day, and Frozen all into one mantel. I will share the mantel later this week, but I am sharing the main focal point of it today.

I took a piece of foam board I already had in my basement.  I picked out two colors of paint from my container, and figure they both are good representation of the Elsa colors.  

I taped off the foam board just by eyeing it up. I did not really have the time for exact measurements. I used painters tape, and I made sure I pulled it off the foam board before it dried completely. It came off pretty easily.  I used some scrapbook paper to cut out a heart, and then I taped it in the center. That way I would end up with a pretty good size heart in the middle.
 I was drawing this idea on paper while watching Blue Bloods last Friday. I am am sure glad I was able to come up with something that is not exactly for one holiday or occassion in particular. It will save me from having to change it, and plus I'm excited to do something for Valentine's Day that is not exactly just red and pink.  Thanks so much for stopping by!

Friday, January 2, 2015

Baby Food Lid Snowman

Happy New Year to all of you! I hope your 2015 is off to a great start! Wynn and I have had a lot of time to do some crafting during this week of the holidays. That meant of course that I pulled out my stash of apple sauce and baby food lids. 


The Target brand applesauce has white food lids, and I've found them to be perfect for winter crafting. We took three of the lids and made little snowmen. I used three lids, a piece of orange scrapbook paper, glue, googly eyes and some yarn I had on hand.

Wynn helped me to thread through some yarn to attach the three caps together. Then we used a dab of Elmer's glue to attach to eyes to the top lid. Then we cut out long traingles in the cardstock to make some noses for our snowman.  The yarn also serves as if it is a scarf at the top of the snowmen as well. Then we used one other piece of yarn to create a hook to hang the snowman with at the top.

 Hope you like our newest creation for our food lid crafting.  Happy Winter!


Here are some of the other projects I've made using baby food lids. They are all super kid friendly if you choose to use something other than a glue gun of course.  I would love to hear about if you've ever made anything using these lids. I've found them to be very fun to use with Wynn.


Thanks for stopping by! I hope to share another project that Wynn and I have created with you next week.