Showing posts with label wainscoting. Show all posts

Tuesday, August 7, 2012

Family Room Feature by Kirsten and Bobby

My friends recently updated their finished basement. I asked if they would mind sharing it here on our blog and they agreed! Take it away, Kirsten! :)

Thank you to Megan and Our Pinteresting Family for featuring this basement re-do on your blog. We are very honored, and excited to share our project!  Here a sneak peek:
The basement was already finished when the house was purchased in 2010. It had carpet, butter yellow walls, and a red accent wall. This was not in keeping with the style of the rest of the house, but it was functional. The space was not furnished, so it wasn’t used much anyway. Originally, we were going to paint the basement a more earth-toned color and call it a day! But, we were inspired along the way to make this a space we truly love!
Here is Bobby—a home improvement contractor by trade. He worked on this basement during evenings and weekends throughout the spring and summer.  In this picture, we were just getting started. Bobby was able to obtain wood “scraps” from a good friend. There were enough of these good quality pine pieces to create wainscoting for the entire basement.  Bobby cut each piece to 38 inches in height and beveled the edges for a more refined look. Cost: $0 J 

Bobby, my Dad, and I then laid out the boards of random-sized widths across each wall. The boards were then nailed in place with a pneumatic nailer. We used putty to fill the small nail holes. Bobby added two places for light fixtures and a new wall switch, too!
In this picture, you can see what the boards looked like as we progressed around the room.  We primed the boards prior to painting them. This was raw wood, so it soaked up a lot of paint!
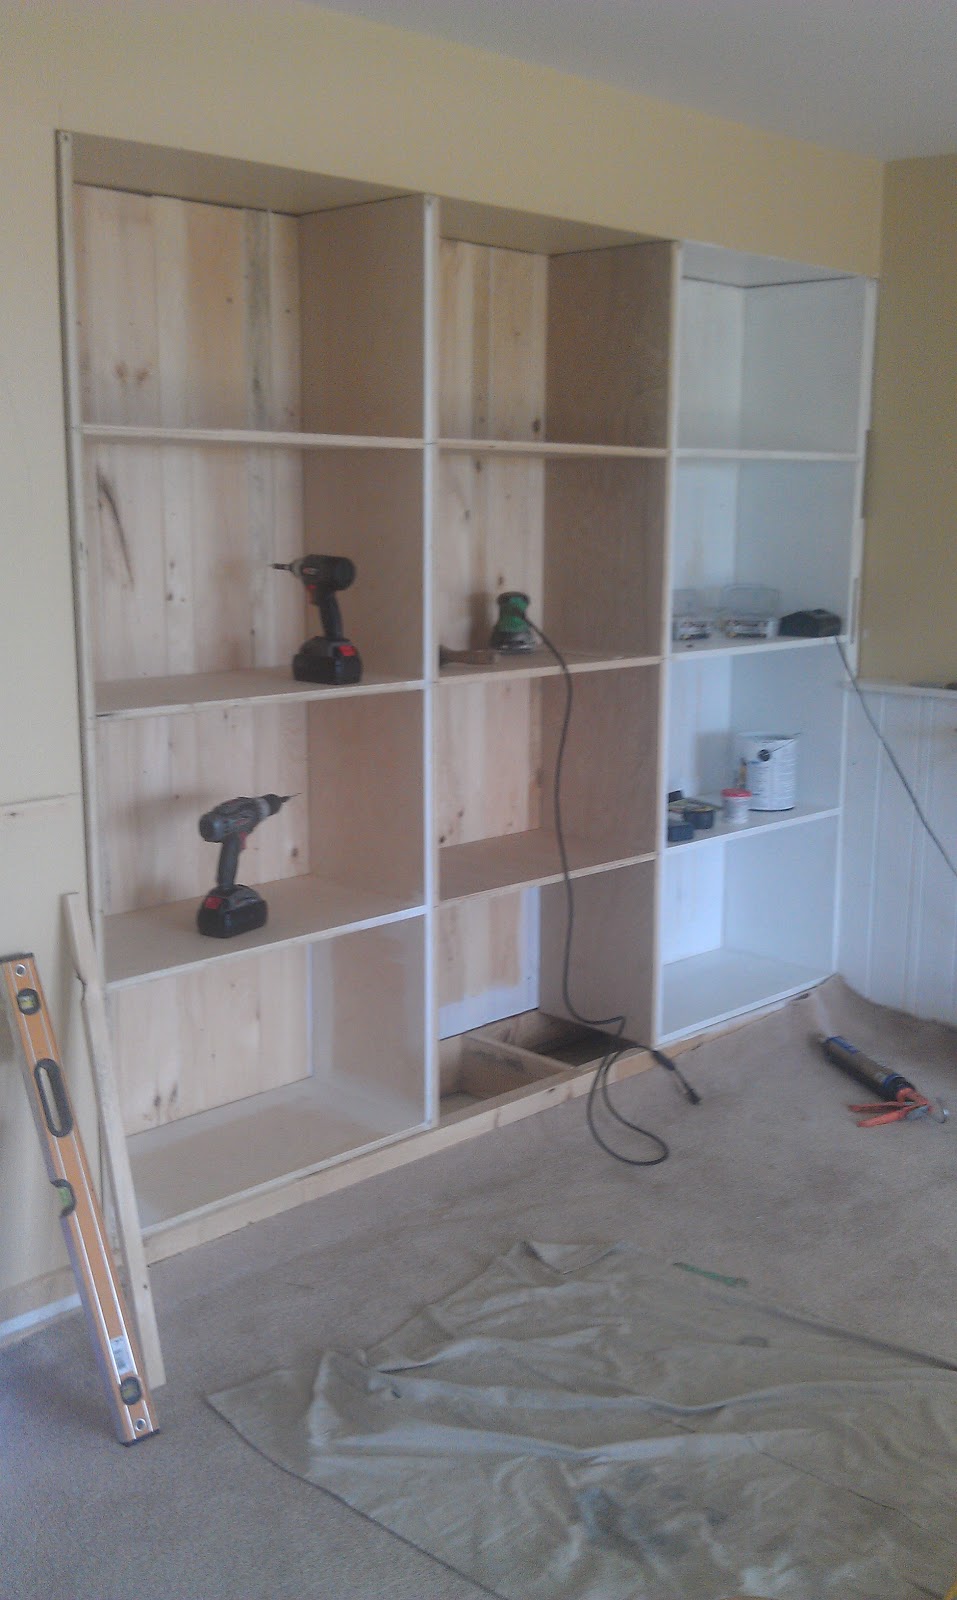
There was enough wood to add the same beveled edge wainscoting to the recessed accent wall that used to be red. Bobby then spent time creating built-in shelving. We did purchase three sheets of cabinet grade plywood for this shelving. The trim for the shelving was cut and sanded from the same wood that we used for the wainscoting and the back of the book shelf. Cost of plywood: $ 45 per sheet
There was no better time to change the flooring than during this project!  We came across a large quantity of well-priced  tile at Lowes. This was part of a discontinued lot from Interceramic, and is regularly priced at $4.50 per square foot. We got it for $1.98 per square foot! The tile is a dark chestnut color with a hand-scraped finished for texture. Laying tile is a regular part of Bobby’s everyday work, and he is quite good!  So, I didn’t help at all during this phase. I was strictly a cheerleader! Cost for 440 square feet of tile, thinset, and grout: $ 1100
Now is a good time to meet Wendell and Remington! They were the most influential factors in deciding to go with tile floors. Puppy proofing is important these days!
In this picture, you can see the new paint for the walls and wainscoting. To save money, we trimmed the top of the wainscoting with wood that was ripped and sanded from the recycled wood. We used two coats of Valspar’s Mark Twain Olive paint in a flat finish on the walls, and three coats of Olympic Ultra White Semi-gloss paint for the wainscoting and shelving.  We also painted the ceiling in two coats of Valspar’s Flat White ceiling paint. Cost for paint: Approximately $220
We also replaced all switches, receptacles and cover plates to match the white wainscoting and trim. Two outdoor lighting fixtures and two ceiling fixtures were added to the room, as well. Cost of electric supplies and light fixtures: $175  Here are the pictures of the finished space! We are so happy with how things turned out!


Thank you for taking the time to look at our project! J
Total Cost: Approximately $1630

Monday, April 16, 2012

Wynn's Room by Rob and Megan

Before we did many DIY or home improvement projects around our house we completed the nursery for our daughter, Wynn.  This was also before we had a blog, so we thought we would share it because it is our favorite room in the house.


Here is a photo of the room the day we moved in, and at the point we began putting the nursery together it still looked like this a year later.  Rob began by laying Brazillian Koa flooring in the room and in the closet.  We then bought a zebra rug from Overstock for around $60.00.  That's our boy Barkley not looking very happy.  


 Rob then used mdf board to create wainscoting around the room.  He framed out the wainscoting but left it as plain wall inside each "box"   We painted it white and then painted above with Valspar's Woodlawn Silver Brook. We knew we were having a girl but liked the look of blue in her room.  


We ordered a decal with Wynn's name from A Hint of Chic Boutique on Etsy  and a ribbon mobile from Polka Dot Skies on Etsy. Our furniture is by Cocoon and we purchased it through WayFair.
 I framed coordinating scrapbook paper because I couldn't find any artwork that really matched the look that I was going for.
I
 I was able to get a matching bookcase from Target and decorated it with some of the gifts Wynn received at the shower.
Here is the finished room. We got some drapes from Tuesday Morning and added a chenille glider from Babies R US.  I guess I should take an after picture since Wynn is now two and using this room. Just picture books all over the place instead of on the bookshelf.  :)


Thank you for stopping by!


">