Showing posts with label DIY. Show all posts

Monday, July 24, 2017

Our New Shed


Well, we accomplished something on our annual to do list. The shed is  now complete. We purchased a plan from iCreate Plans.  Rob really liked the plans they provided and made minor changes to adjust the shed to his needs. The size of the shed is 12 by 16. We highly recommend their plans on this site. This plan was actually for a modern studio, but Rob liked the window set up and we needed light since it does not have electric in it...yet.


Then we had to go through the permitting process, and that took a lot longer than anticipated. That backed our project up several months.

Rob began working the second weekend in April, and worked pretty much whenever he had a chance between then and the weekend before Memorial Day.  Here are the before and after pictures of the process.  We are not going to share the step by step process as that is the point of using the plans that you pay a small fee on Icreatables.com.  We did use Sherwin Williams Gauntlet Gray for the outside, and barn paint from Lowe's for the trim. We also used smaller windows then recommended to reduce someone from breaking in if that ever came up. It sits pretty far from our house, and we did not want to risk it. We also did several different locking systems on it to keep it very secure.


Overall, Rob was very happy on how it turned out. It got the big items out of our garage, and now he has the room to do projects with this tool collection. Next up is a play house and a loft bed for our daughter. Here is hoping that works!  

Monday, June 13, 2016

DIY Workshops - Father's Day Football Toss & THD Virtual Party

This post is sponsored by The Home Depot


Last Monday, we shared the exciting news that we were going to share our DIY Workshop project with you today. The Home Depot offers FREE DIY Workshops at all their locations, and they are for do-it-yourselfers of all experience and age levels. We have participated in them in the past and enjoyed them.

The three types of Free Workshops they offer are:

  • Do-It-Yourself (DIY)
  • Do-It-Herself (DIY)
  • Kids

Customers can learn how to build decor projects, how to make easy home repairs, and how to operate tools through demonstrations and step-by-step instructions. 

If you want to learn how to do this project at the demonstration you can sign up at all The Home Depot locations. You will learn the essential components needed to recreate this project at home.


Saturday, June 18th
10:00-11:00 am

Remember, we are just one of many blogs sharing our version of the DIY Workshop project.  Check out the inspiring ideas from all of the other bloggers in the virtual party at the bottom of this post.  I am sure you will find something that will help you create your own toss game.  
The original project that was the inspiration from The Home Depot was made to look like a football field.  We are a football loving family indeed, but we decided to take another spin on the project. My husband, Rob, loves golf and Father's Day is the weekend in which the U.S. Open is played by The PGA Tour. We decided it would be a perfect opportunity to turn this into not just a game where you could toss a ball, but chip golf balls into as well. Please see the very bottom for the rules we created for this game, and printable score cards. 

Here are the materials that you will need in order to complete the project. 

  • 1 - 1/2" x 2" x 4'  sanded plywood board
  • 1 - 1" x 4" x 12" common board
  • 2 packs - Everbilt #10 x 1 1/4" Phillips Zinc-Plated Flat- Head Wood Screw 
  • 1 pack  Everbilt #10 x 3/4" Phillips Zinc-Plated Flat-Head Wood Screw
  • 1 Pack - Everbilt 2 1/2" Zinc-Plated Narrow Utility Hinges (2 pack)
  • Paint or Stain
  • One Foot Length of String or Twine
  • One Small Nail of Any Type
Tools Needed:

  • Circular Saw
  • Reciprocator Saw
  • Drill
  • Drill Bits - 1/2" and 1/8"
  • Heavy Duty Stapler and Staples
  • Pair of Snips or Wire Cutter
  • Measuring Tape or Carpenters Square
  • Pencil
  • Safety Googles
  • Sanding Block
Step 1 is to measure and mark the boards. The common board will be used to make the legs and the braces. Measure four legs at 1" by 4" x 2', and the brace will be 2' by 3'.  
Using a circular saw, cut the legs and braces from the (2) 1" x 4" by 12" boards, and the front panel from the  2' x 4' plywood board. Assemble the frame next by laying two of the legs flat, 2 feet apart.  Then lay two of the braces on the top of the legs, and one 3 feet below the top.  We then secured each of them with a clamp.  Pre-drill each hole with a 1/8" drill bit before using the screws to avoid splitting the wood.  Next, using a drill and 1 1/4"screws, secure each brace.  Then do the same thing with the second set of legs and braces.

The next step is to create the front a panel. Looking at the 2' by 3' plywood board vertically, mark 9" from the top and 9" from the bottom.  Nail a nail into the center of the bottom mark.   Tie one end of a string around the nail head, and the one end around the pencil ensuring the string is 6" from nail to pencil. Next draw a circle keeping the string tight as you go around.  You should now have a 12" diameter circle.  


Create a circle again using the other nail, but tie the string to the pencil and make the length 4". Then draw the circle around holding the string tight.  Now, you have a 8" diameter circle on the top.


Using a 1/2" drill bit, pre-drill one hold inside the edge of both circles.  Using a reciprocator saw, cut both of the circles out.


Attach the front panel by placing it between the two braces, and making sure it lines up flush with the top of the legs. Pre-drill the holes for the two screws by using a 1/8" drill bit. Using two 1/4" wood screws, attach the front panel to the frame.  


Attach the hinges to the boards by laying both frames back to back with the plywood and braces facing outward.  Using the drill, secure the hinges to the top side of each frame.
Here it is assembled prior to being painted. There are so many ways you can customize this project to your own interests.


We first painted the entire game with Behr Ultra Pure White paint.  We used a quart of that, and then bought the other colors in sample sizes. First we made the golf ball design using Behr Ultra Iron Mountain mixed with Pure White on the front of the board.  

We cut out 2 1/4" cardstock circles and used the circles as a stencil for the dimples of the ball. Using a vinyl cutting machine we cut out the lettering for our last name to mimic the product name on an a golf ball. You can also purchase adhesive lettering for address purposes at The Home Depot. We also assigned it a number as all golf balls have on them as well. 

The bottom of the front section was painted in Behr Ultra Green Energy Flat Matte to resemble the ball sitting on the grass. 

As you can see below, the boys in our house are already finding time to enjoy the new game in the yard. The twins were using the plastic golf balls from their toy sets and wiffle ball golf balls. Rob is using the standard golf balls. To sign up to participate in The Home Depot FREE DIY Workshop where you can build this yourself please follow this link.


Backyard Golf Rules
                Growing up I would play a game of Wiffle golf. The object of the game was to hit a basketball with a Wiffle golf ball.  It was fun, and we would roll the ball out and use flower beds and driveways as pretend water.  Now that I am older,  and The Home Depot gave us this opportunity I have revamped the game a little.  Short game work is important and can be done at home.  I know we do not have a putting green in our front yard, so chipping practice is all we can do.
Playing Set up
The playing board is propped up in a location where you are not going to endanger anyone with a wayward shot.  From the front of the board you designate three lines.  The distance for each line is dependent on the skill level of you and your opponent.  The line closest to the board represents par 3’s, the middle line is for par 4’s, and the furthest line is for the par 5 attempts.   It helps to give each player three Wiffle balls so you are not walking back and forth too often. 
Scoring
                The scoring rules are simple: any ball that strikes the board is marked down as par for that shot and any ball that misses the board is a bogey.   Each shot that goes through the eight inch top hole is an eagle, while the bottom twelve inch hole is a birdie.   You can use the scorecard by clicking this link.

Virtual Party! Here are the links to the other amazing bloggers who have also created their own versions of the Father's Day Football Toss Project!


We hope you have fun going to The Home Depot Free DIY workshop, and building this yourself.  Do not forget to share you projects on social media using the hashtag #DIYworkshop. We cannot wait to see what you do with your version.

*I acknowledge that The Home Depot is partnering with me to participate in this Workshops Program. As a part of the Program, I am receiving compensation in the form of products and services, for the purpose of promoting The Home Depot. All expressed opinions and experiences are my own words. My post complies with the Word Of Mouth Marketing Association (WOMMA) Ethics Code and applicable Federal Trade Commision guidelines.*

Wednesday, November 11, 2015

Hand Print Art

I saw this adorable project by Creatively Living Blog when I was perusing Pinterest early one morning with the baby.  I immediately began the search for a long and narrow frame in a gray color.  I found a frame at Kohls for around $10. It was the perfect size for this project.  This would also make a great holiday gift as well.


I mixed up some black and white finger paint to get a dark gray, and painted all of the kids hands when they woke up from their naps. Have some baby wipes nearby because they make for easy clean up. Then I simply wrote their names with a Sharpie, and put them in order from youngest to oldest. Such a simple project, and I absolutely adore how tiny the baby's hand is in this project.

Now it is hanging up right next to the newly painted fireplace.  Thanks for stopping by!


Sunday, November 1, 2015

Bathroom Vanities Into A Playroom Desk

You may have remembered us sharing our playroom progress a few months ago.  If you are new to our blog you can check it out here.  Rob had made a small space to eventually put into place a desk space for our daughter to do her artwork or homework. We exhausted our budget and decided that the desk could wait. There was definitely a good reason to wait to start this project.  


Fast forward five months or so, and my mother in law messaged us asking if we wanted cabinets that her neighbor was planning on throwing out.  Rob sent immediately said we would take them, and it also included a counter which was exactly what we needed as well.  

We did not need the entire cabinet though, and we only needed the side with the drawers. Rob took the back of the vanity off, and the door on the front. The left side of the vanity was removed as was the bottom.  Then he took apart the front of the cabinet that surrounded the main door. He trimmed the wood between the main cabinet and the drawers to match the width of the other side of the drawers.


After this was done the back and bottom panels were also trimmed. The side panel on the left was reattached. Too bad the cabinets were spray painted from their original cherry fronts. Therefore, we decided to have Rob use the Wagoner power sprayer to use the leftover Sherwin Williams Anonymous Gray to paint the vanity. The drawer fronts were distressed, and then clear semi-gloss polyurethane was sprayed on them.  


The counter top was originally six feet long, and was cut down to fit in the space. First a few inches was cut off of the back of the counter.  Then it was cut down length wise to fit into the space. Then L-brackets were used to attach it to the wall.


At Target we purchased an easy to assemble counter height stool that fits perfectly underneath the desk. I also purchased new simple hardware for the four drawers that open.


Wednesday, June 10, 2015

Patriotic Eraser Stamped Shirt


I had pinned this cute idea from the blog Cutesy Crafts.  I decided that we would make this shirt for a Fourth of July picnic we are going to this summer. I picked up a $4.50 shirt from Target yesterday. It was the perfect price to make a custom shirt.  
You will also need pencils with new erasers (I used some leftover Dollar Tree pencils), fabric paint, freezer paper, shape cut out of any type of paper, and an iron.

Decide on the shape that you would like to use and trace it on the non-shiny side of the freezer paper. Then cut it out and use an iron on medium heat to adhere the freezer paper to the shirt.
Wynn asked for a heart shape. Then I placed a little bit of paint on some parchment paper for her to dip the erasers into. It made for much easier clean up at the end.  Then Wynn would simply stamp on the eraser until it ran out of paint on the end of it. Then she was on a roll stamping the eraser all around the heart shape. Then we did the same thing with the blue paint as well.
We let the paint dry for a few hours and then we simply pulled off the freezer paper very gently.  It came off quite easily.
Here is Wynn in her newly designed shirt.  I think we may have to do this for a few of the holidays coming up. Maybe pumpkins for the pumpkin patch trip or even a Christmas tree in the winter.  Maybe even a number shirt for a birthday celebration.  For more ideas check out the Cutesy Crafts Blog.  Thanks so much for stopping by!

Sunday, May 31, 2015

Playroom Directional Sign

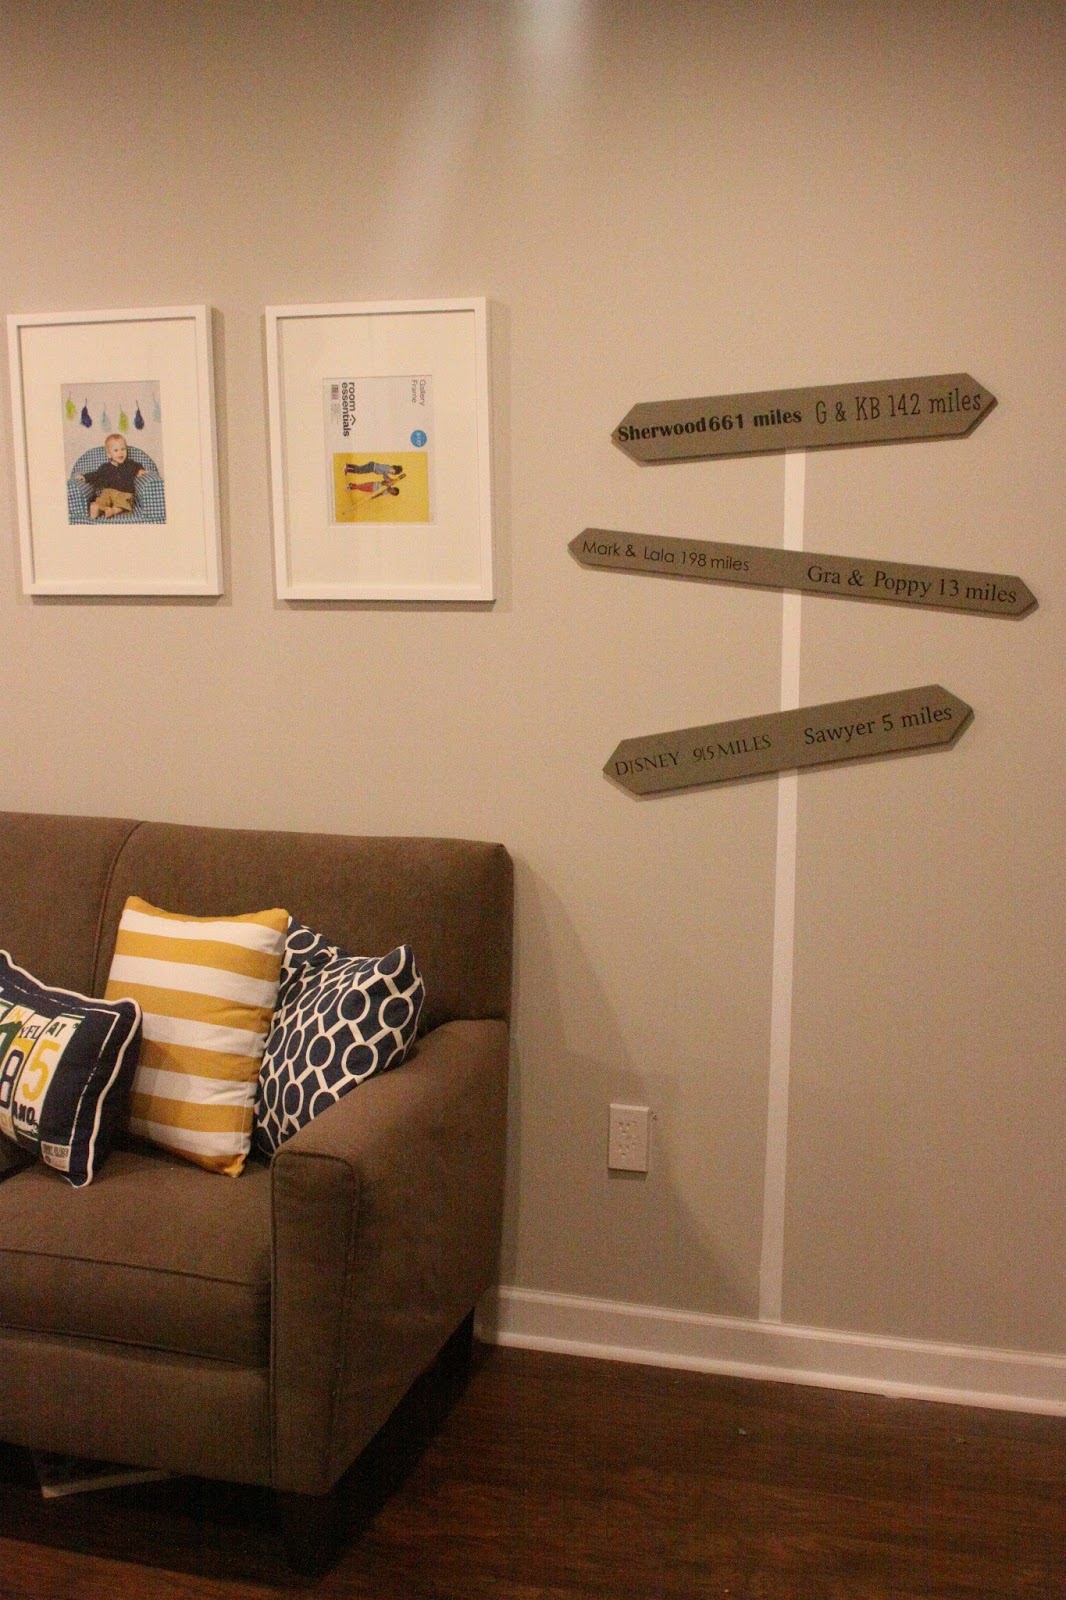
Still working on the playroom I came up with something we could put on the wall on the opposite side of the couch from the PLAY sign.  I thought of doing a sign with the mileage information to some of our family members homes.

First I went to search through the scrap wood pile in the garage for some pieces to use for the sign.
I thought I would attach it all to a wooden post, but then Rob suggested we just paint a fake post onto the wall to not worry about screwing it all into the wall, and pushing off the wall even farther.

I used my Silhouettte Cameo machine and chose a few various fonts to create the wording. I used Google Maps to get general mileage information, and then cut out the wording on black vinyl. 

We had some leftover Sherwin Williams Anonymous Gray paint to use on them.  I painted them after a light sanding and Rob cutting pointed ends on the pieces.
 It only took one coat to cover the pieces and once they were dry I applied the vinyl lettering using the Silhouette transfer paper. I ended up putting two locations on one piece of wood after Rob suggested doing this, and then I took off the -'s for the locations to fit them all on together.
I taped off a line with Frog Tape on the wall, and Rob used some leftover trim paint to paint a white post.  Then he nailed in the three signs at random angles.  

We included the grandparents and various other special people to the kids. Wynn offered the idea of Disney World the other day, and so I included that as well.

Hope you enjoyed this idea, and thanks so much for stopping by our blog.


Tuesday, May 26, 2015

PLAY in the Playroom

We are continuing to make progress on the playroom.  I am so glad Rob tackled the major parts of it before I was in the final trimester with baby #4. I am starting to slow down with the projects on my end, but my to do list seems to just get longer and longer.

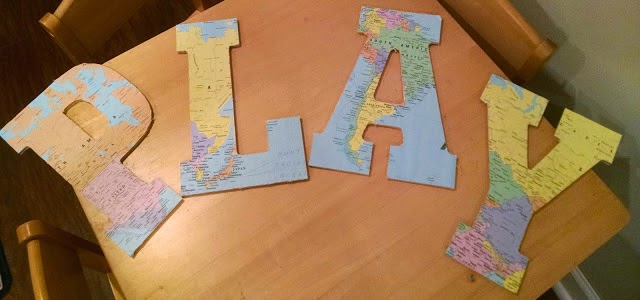
I picked up some wooden letters that spell out the word PLAY for the wall behind the couch.


I picked up some wooden letters that spell out the word PLAY for the wall behind the couch.
Rob asked a fellow teacher if he had any maps he was not using anymore in his class. He gave us several and they turned out to work perfectly. Plus, we have a few more for other projects in our future.  I had picked up a large canvas from Home Goods, and hung it on the wall. Then I received some pillows I'll share below, and decided that a "transportation" themed playroom would be a fun choice. Then I was able to get some direction....literally.
I took the maps and cut them out around the letters leaving a little bit of room for trimming later. Then I put some Mod Podge on the letters and put them face down on the map itself. Then I used my handy dandy Pampered Chef scrapper to help get out all the bubbles and wrinkles.  I sealed the top of each letter with another coat of Mod Podge the next day. Then gave it another day to fully dry.
Then Rob trimmed around the edges with an exacto knife. We placed hanging pieces on the back of edge letter to hang them on the wall.


I took the two blue pillows on the couch from the bed in the boys room. I purchased them from The Pillow People on Etsy two years ago.  I purchased the yellow pillow covers off of Amazon to cover the pillows the couch we bought of CL originally came with. The license plate pillows were a clearance find by my best friend, and she picked them up for me a few weeks ago and said they could be a Mother's Day present. What a great friend! Plus she helped me figure out that I could go with a transportation theme when I paired them with the canvas I bought earlier.


I wanted to hang up some of the recent pictures of the kiddos done by my friend Michelle at Michelle Albright Photography.  I found these great white frames from Target  for approximately $20 a piece. I ordered size 11 x 14 photos for the 8 x 10 spaces, and their little faces fit great. I did not want them to look too small.  The fourth frame is obviously blank for Baby Boy Vaughn coming in August.

Next up I will be sharing our DIY chalkboard project that is directly across the room from this couch.  Our daughter has definitely enjoyed it so far, and has already given everyone their own designated space on the board. We will see if everyone follows instructions soon enough.


Other Playroom Posts:
Playroom Part #1 - Blank Space into a Room
Playroom Part #2 - Doors, Trim and Painted Stairs
Playroom #3 - projector

Monday, April 20, 2015

Updating Outdoor Furniture With Paint

Valspar's outdoor spray paint for plastic items may be my new best friend. It makes something drab turn into something fabulous with only a few minor steps.  We have had a few plastic chairs for our side yard for a few years. I purchased them at a local pharmacy for $10 a piece on a random sale day.  They are perfect because we can take them anywhere in the yard the kiddos want to play. The colors I found at Lowe's were a navy and light blue. They are only a few dollars a can, and so it is a lot cheaper to do this than purchase new chairs.
The first step was to power wash the chairs in order to get them nice and clean for the spray paint. I will admit that it makes the chair feel a bit gritty once it has been power washed, but the spray paint gave it a smooth feeling again.  As you can see the chairs began as plain tan and were not exactly inviting.

Each chair took approximately two cans of spray paint with two coats on them each. We have two other chairs to go, but we wanted to see how the color works out. The lighter blue worked better because it was closer to the original shade, and the darker navy needed more of a second coat due to the tan showing through.

I purchased some outdoor throw pillows last summer from Overstock, and the colors blend perfectly with the chairs now. I am so happy to give these chairs a new life because we will be getting a lot of use out of them this season that is for sure.

Tuesday, April 14, 2015

Effortless and No Sew Table Runner

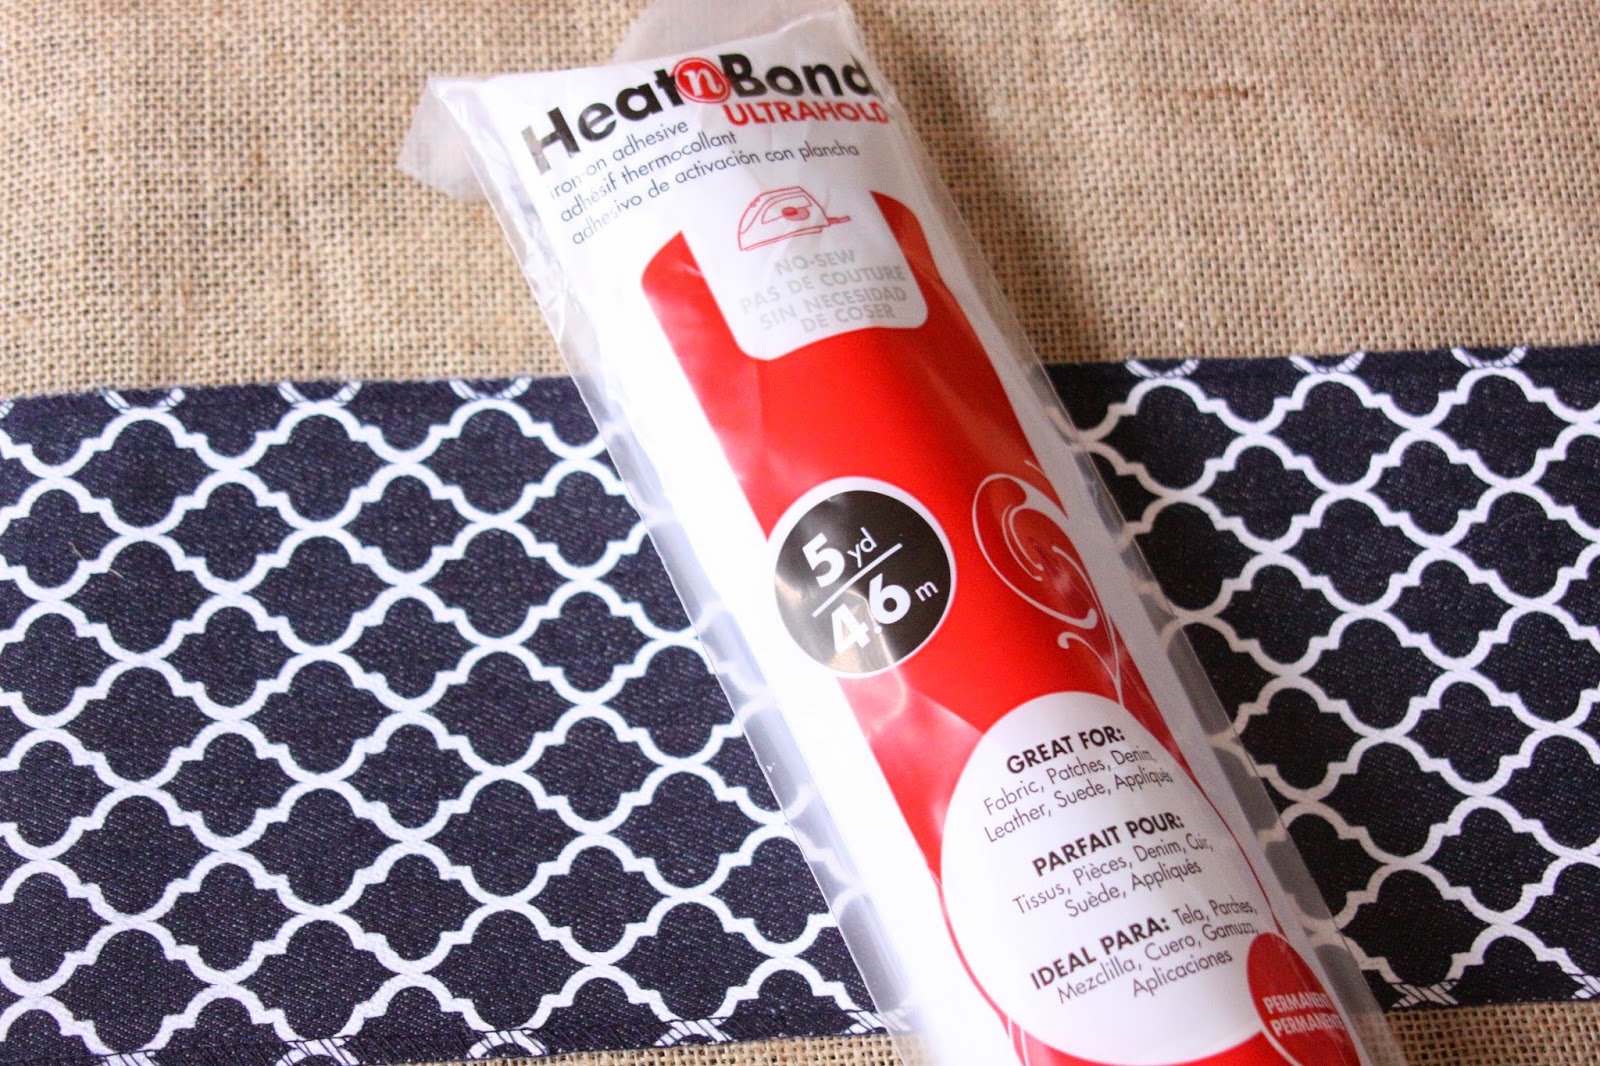
Oh how I wish that I could sew something. Maybe one of these days I will have a chance to learn, but until then I will have to rely on my best friend Heat N Bond to give me the feeling as if I have done a sewing project.

I purchased a roll of denim material in a roll with a trellis pattern on it from Michaels for around $6. I used about half the roll for this project. 


Last year, I had picked up this table runner at Hobby Lobby for less than $10. I had saved it until I had a way I could make a simple update to it. I did not want to paint it or stencil it. I figured it would be cute to add this denim fabric to it.


Heat N Bond is so simple to use. All you need is an iron to help you adhere it to a fabric, and attach the fabric to your surface.  I purchased the Ultra Hold version because I knew the denim was thick. You use an iron to attach the Head N Bond to the demin fabric, and then you peel off the paper backing. Then you place the denim face up on the burlap runner to and use the iron to fuse the two pieces of fabric together.  I just placed it straight down the middle and it took about ten to fifteen minutes to get it completely attached.
I added it with my owl vase that I found at Michaels last year on clearance for $3 and some flowers I picked up while I was grocery shopping on afternoon.

Gives my usually neglected table a little something between the holiday related items I may throw on there every once in a while. Also, it seems none of the kids are interested in pulling it off which I consider to be a win in my book. Thanks for stopping by!