Hello fans and followers of Our Pinteresting Family! I'm Danni from Silo Hill Farm blog and I was so excited when Megan asked me to do a guest post for her. I have no idea how she managed to keep doing projects and posting them right up until her due date, but I'm happy to help her out now! Of course, I wanted to do something baby-ish related, problem is, my babies are grown and gone...but..I'm lucky enough to have a beautiful grandson so I used his little fingerprint to make this layered pendant necklace.
I searched back on Megans fabulous blog to see just when I started following Our Pinteresting Family. Turns out, my first comment to Megan was on this post for a fabulous Necklace Organizer that caught my eye. Coincidence? I think not!
Although I have a lot of jewelry making supplies, I do not make a lot of jewelry. I did make a promise to myself that I would try to utilize those tools and supplies more this winter and this is my first attempt. I have to say that my friend Natalie at NorthShore Days, makes the most fabulous jewelry and does some very good tutorials. It was this layered necklace that inspired me....
| Achieving the Layered Pendant Look |
About 3 years ago, I was holding my grandson's hand while we were walking through the woods and the idea for a pendant with his little fingerprint on it popped into my head. Now because I'm a girl who gets right on it, when we got back into the house, I got out some Fimo clay and made a little ball, flattened it out, pressed his little fingerprint into it, poked a hole in the top, baked it in the oven to harden it and then stuck it in my jewelry box....for THREE years! Yeah..that's gettin right on it! So, when I pulled it out last week to make this project, it looked like this...
So precious and tiny. *sigh*. Also, a little grey and plain. I got out some primer and spray painted it.
I chose a platinum acrylic paint to give it some color. Two light coats because I didn't want the paint to fill in the little fingerprint impression so you couldn't see it.
Then I ran into a problem. It was really hard to see that little print in the shiny paint. Hmmm. Plan B. I added just a just a little bit of black acrylic to the platinum and used a Q-tip to rub it into the impression ever so lightly.
Worked perfectly. Whew! I gave it a quick shot of clear acrylic spray paint, so I wouldn't knick it up during assembly.
I dug into my jewelry beads, supplies and findings that I've been collecting for a couple of years and chose some things that had special meaning to me.
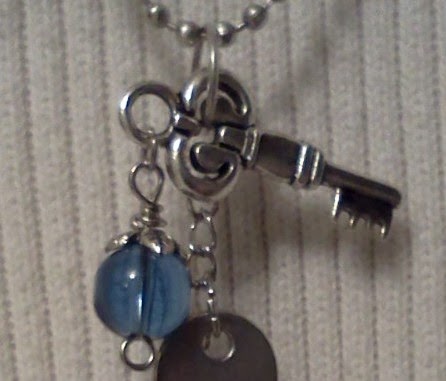
I played around with this stuff for 2 days trying to get it just right. For me, the little key was the problem. I finally figured out how to balance it horizontally by hanging a bead down the left side of it.
After that, the rest was pretty easy! I chose that blue bead because it reminds me of Jacob's beautiful blue eyes.
Of course, he holds the key to my heart. There's an awesomeness to little boys with their mixture of mischief, orneriness and sweetness and I'm excited for Megan to have TWO of them! They grow up so fast and now that Jacob is 6 (and knows everything), I kind of like wearing this necklace and reaching up to feel that little fingerprint from that beautiful day in the woods 3 years ago!
My only other attempt at making jewelry was this bracelet for Valentines Day.
![]() |
| Heart Me Up! Valentines Day Necklace |