Showing posts with label laundry room. Show all posts

Thursday, June 26, 2014

Laundry Room Progress

We have made some progress in the laundry room. After Rob installed a new bead board drop ceiling he built a new shelf for storage.

When we moved into our house six years ago our laundry room was pretty ordinary. I basically threw everything in there and shut the door. Pale blue walls, ugly drop ceiling and no storage except for a small shelf.

Our new drop ceiling was the first item on the to do list.  We did have to change our wireless router that Rob hid in the ceiling, and he said it was quick and easy to remove the panel for access.

I purchased this large canvas on clearance for $20. I was in search of something large and inexpensive.  I had a chance to swing by Kohl's, and I just happened to locate this. I thought it would look nice with the gray walls.

I got this adorable rug at Marshall's for $14. It is approximately three by five feet, and perfect for just in front of the washer and dryer.

I also grabbed some lined baskets from Home Goods during my lunch hour one day to store the various laundry related items.  I think they were about $10 a piece.
It is difficult to take pictures of this room for me because there is no natural light. The walls were painted in leftover Sherwin Williams Repose Gray. We used this in the nursery, and I thought it would brighten up this room as well.

Rob built the nine foot long shelf that is above our washer and dryer now. We previously had cabinets, and about a month before the boys came last fall one fell off the wall. It took out the hot and cold lines you see just below the shelf. Water gushed out of the wall for about ten minutes, and as you can imagine it did not take long to flood an entire level of our house. Therefore, we decided a shelf with very sturdy brackets would make more sense to have in this room. Especially because we are unsure the studs in the wall can handle the weight of large cabinets. 


Rob had to put a couple pieces of wood together to make the shelf. He routed a nice beveled edge along it and stained it.

Next on the do to list is to make a skirt for around the utility sink.  We originally were just going to leave the vinyl tile floors in tact.  But, Rob found some flooring on clearance at Home Depot for less than $50. The original price tag was $450! When he finds some time this summer he hopes to install it. I am looking forward to saying goodbye to the vinyl tile and hello wide plank Pergo.

Thanks for stopping by!


Monday, April 21, 2014

Laundry Room Beadboard Drop Ceiling


Spring is in the air, and that means that Rob is going stir crazy to start some sort of project.  We have the basic run of the mill laundry room. It has the ever so beautiful florescent box light fixture. This hasn't worked in over a year, because we wanted to replace it at some point instead of buying more florescent tubes to fix it. We just had our old floor lamp in there until this week.  The pictures are done with our phones mostly because it was easier for us in the time we had to take them.


Rob came up with an idea of how to update the lovely drop ceiling already in there. We knew we couldn't do a normal ceiling due to all the pipes that run above it to our three bathrooms and laundry room. And with the amount of water issues and leaks that we have in our home it was a good idea to keep it like the drop ceiling we already have.  Rob got out his pad and pencil and drew a design he thought he wanted to work on. 

First we took out the existing light fixture, ceiling tiles and metal brackets.  

The next step was framing out the new ceiling, and that way the bead board ceiling would have something to rest on.  Rob placed 1 x 6 pre-primed pine around the edges of the ceiling. This was basically in the same spot at the original drop ceiling.   Please obviously excuse the cords and pipes.  This is obviously why we needed a drop ceiling to remain in this room.


Here you can see around the edges of the ceiling where Rob has the 1 x 6 pieces in place. 
We needed a place to put our router due to the location it needed to be in. Instead of having it on the shelf or shelves we are installing later, Rob chose to hide them up on the ceiling. He used bolts to attach a piece of leftover wood to serve as a shelf inside the ceiling.


The sheets of beadboard were purchased from Lowe's along with the foam they are lined with to help with lessening the noise from the washer and dryer. Then he placed the pieces in their frame just as you would a typical drop ceiling. This just looks nicer than those 80's looking panels we had before.  Here is a view from below. You can see he added a bit of trim modeling around the edges of the beadboard that had not been painted yet in this picture.


He bought this light from Lowe's for $40.  It is so much better than our former light fixture. The light it provides for this window less space is great.
Here is some detailed information on how Rob went about assembling and building the ceiling:

We started by ripping 2 x 4's in half (you could use 2 x 2's) and screwing them to the wall 3/4" above where we wanted the ceiling to be.  While taking the old drop ceiling down I took a pencil and traced the bottom of the bracket around the room.  After I hung the 2 x 4 I ripped off 3/4" of the 1 x 6 pre-primed pine boards (this gets routed and then tacked back on later).  I screwed them to the 2 x2  using 2 inch drywall screws around the parameter and also placed a eye hook on the part of the board facing the floor joists so that I could add some wire to attach them to the joists later for extra strength (though it didn't need it). 

I attached each of the pine pieces to each other using the Kreg system pocket screws.  I then made the center section roughly the same size as the each of the four quadrants. When I cut the wood for that I also ripped 3/4" off of each side. I then hung that from the floor joists using eye hooks and 55 lbs strength steel wire that your would use for picture hanging. I then measured off the middle of each wall and attached a piece of wood from the center section to the wall (again ripping off 3/4" off of each) attaching to each using pocket screws and hanging with eye hooks. 

I then cut 32 x 48" to fit up in the opening after gluing ridged green foam to the back (to insulate sound) I placed it in the opening.  The 3/4" pieces that i ripped off earlier I routed a profile on the wood we used a Roman Ogee profile.  I cut them to fit the inside edges mitered for 45 and tacked them in.  This is mainly what the bead board sits on.  The idea being that if I need to access whats above the panel I just pop off the routed piece and the panel drops out.  The light in the center with its medallion hold the center bead board up.  


Here is a look at the finished ceiling after a few days of work.  Next up for us is painting the walls, adding new storage solutions and a new floor. This may take us a few weeks (or months) but we will get it done. 


Thanks for stopping by! We look forward to sharing more of this space with you.

Wednesday, February 5, 2014

DIY Laundry Room Inspiration

Our laundry room is so boring and not so nice. Rob has been itching to get started on a few projects in there this winter. He has been coaching this winter, so there has not been a lot of free time to start such a project. However, I did notice that he was pinning laundry room ideas. That got me excited! Here are some inspiring ideas that we have both pinned and loved.

I absolutely adore these floating shelves that were shared on the blog Four Generations One Roof.  Rob is planning on installing some similar shelving above our washer and dryer. I really like the thickness of her shelving here.I also adore the baskets she has chosen to place on them as well.

We have similar outlet positions as the outlets in the beautiful laundry that Domestic Imperfection created.  It makes me think we can make the outlet work even though I despise the location.


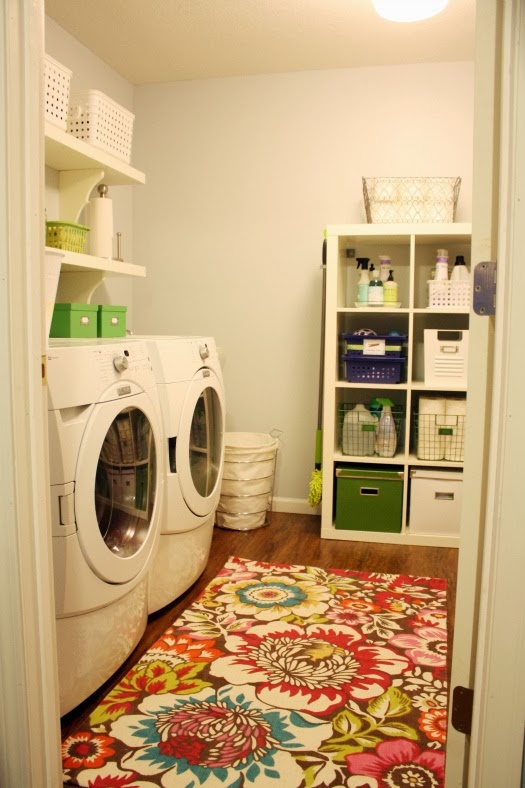
I love the colors and especially the rug that was placed in the beautiful laundry room by I Heart Organizing.  I think that rug is great because it really brightens up the space. Since I do not have a window in my laundry room I think I'll need to add some color to it.

Cristina at Remodelando La Casa has an amazing laundry room, which comes complete with an awesome chalkboard. She has such wonderfully high ceiling in her laundry room too. I wish I could somehow raise my ceilings up to have such great storage up the wall like that.


To see more of the amazing ideas I have pinned check out my DIY Laundry Room board on Pinterest. I hoping that once basketball season ends for Rob's team then this project will move to the front burner as soon as possible.