Showing posts with label Burlap. Show all posts

Monday, September 7, 2015

Fall Wreath and the New Addition

I have been missing in action over the past several weeks. I did actually have a really good reason to be. On August 12th, I gave birth to our fourth child. Our newest addition is our sweet little boy who weighed close to ten pounds. My biggest baby by far. I'm not quite sure how he got that big considering I moved more and had most of my meals eaten by two growing one year olds. It feels like he has already been a part of the family. I am sharing a cute little picture of him at the bottom of this post. 

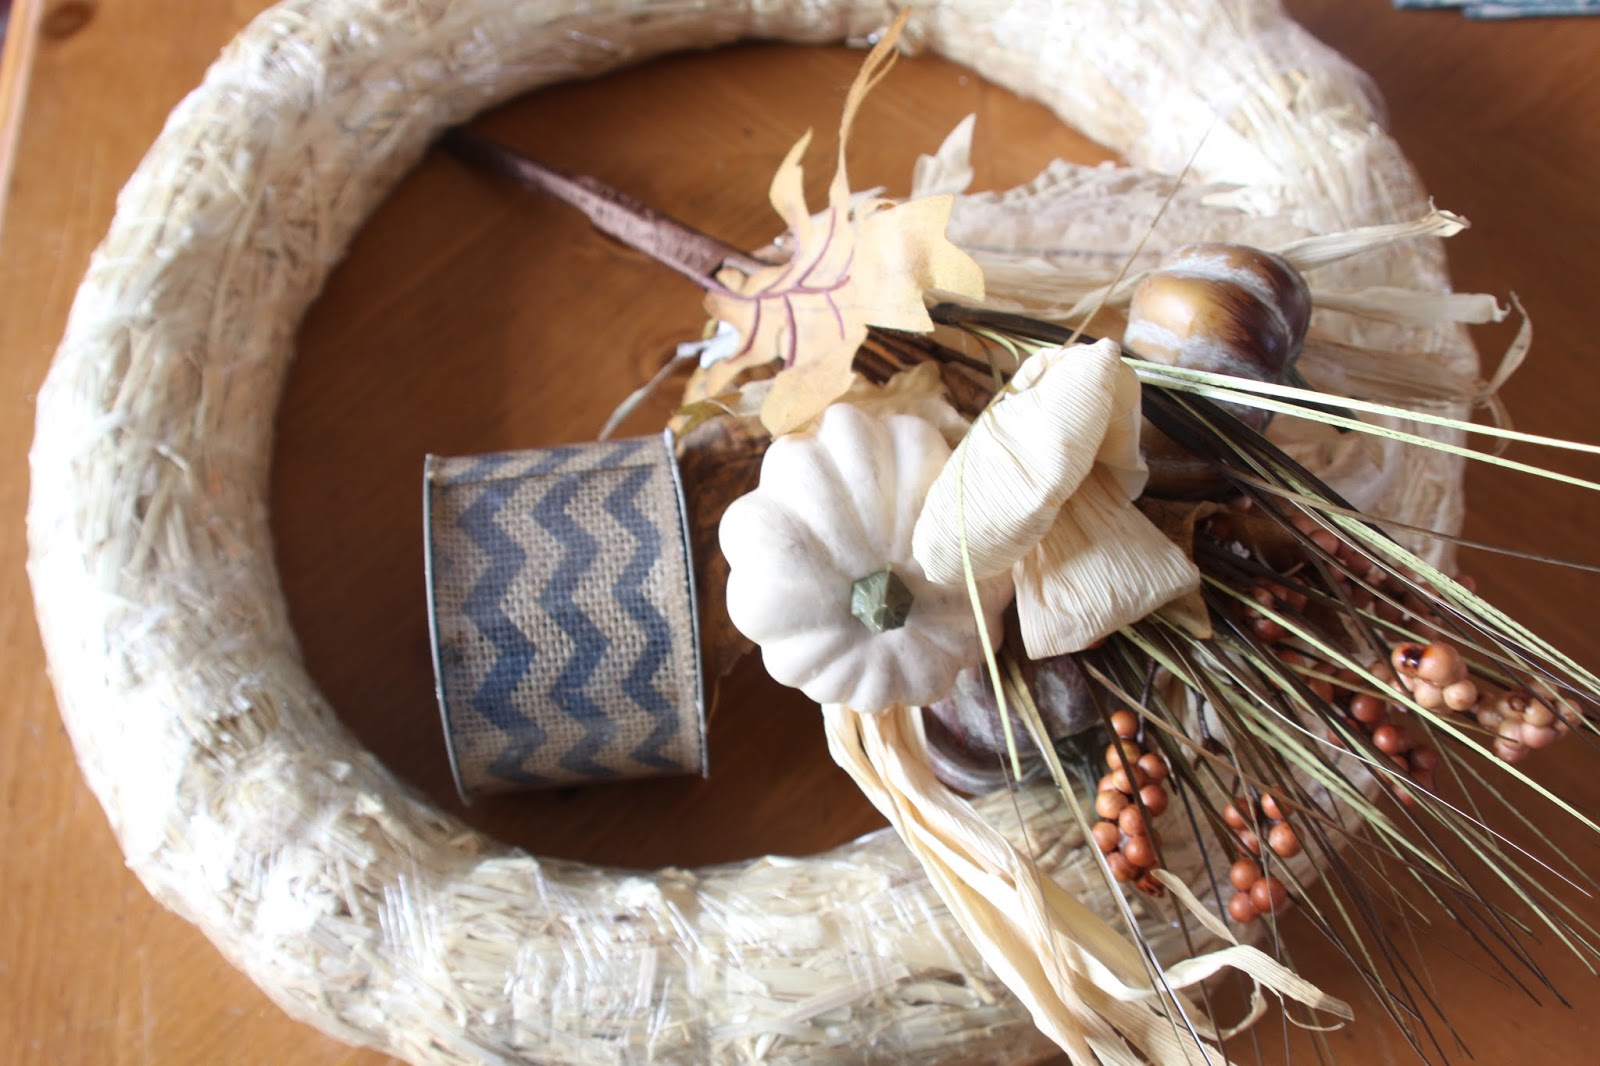
Well, I really wanted to incorporate a new color scheme to my fall decor. I picked up some navy chevron burlap ribbon from Michaels. Using a straw wreath with the plastic covering still in place I wrapped the wreath with the burlap ribbon. Then I took the fall themed arrangement from Michaels and attached it to the wreath with floral wire. 


I made a simple bow from burlap ribbon and brown satin ribbon to top off the wreath. I wanted simple and sweet, and something I could make between feeding the baby. Although, this one was also made with the twins hovering at my feet wondering what I was doing and asking all sorts of questions.


Glad to have something on our front door that says we are ready for the change in season. Even though this week we are still going to be in the low nineties and high eighties temperature wise. Have a great week!


Now here is the picture I promised I would share of our sweet boy.

Sunday, November 16, 2014

Burlap Holiday Wreath

HomeGoods recently opened up in our town and it was a big deal. Generally we have to drive about a half an hour or so to the closest one. I know that does not seem like a lot of time, but it will be nice to have one about five minutes away. I am not sure my wallet will believe that though.  To be honest the only item I purchased was a wooden deer head for $7.  I was not quite sure what I was going to do with it, but I decided it would be incorporated into my holiday mantel.

I have often admired Laura from Top This Top That's beautiful wreaths. Following her amazing tutorial I created this wreath. I am not including the step by step instructions here, so click on the link I just shared for the tips you'll need to create your own.

I used some leftover chevron burlap (4 yards) and approximately 16 yards of plain burlap to create a beautiful wreath.  I used an 18" wire form to make this particular wreath.   The chevron burlap is from Hobby Lobby, and the other materials are from Michaels.


I hung the deer head from the buralp string it came with to attach to the wire frame. This will be headed to my fireplace mantel along with a few other items.

Rob was making a beautiful set of stocking holders today when he unfortunately cut his fingers with his biscuit joiner.  Fortunately, we live close to the hospital and was stitched up quickly.  I told Rob that it may be easier to just purchase the stocking holders I originally shared with him as inspiration.  Thank goodness for great medical attention.  Thanks for stopping by.  

Monday, June 9, 2014

Patriotic Wreath

I had pinned a beautiful Halloween wreath from The Crafted Sparrow a few months ago, and really wanted to create something similar for a wreath for all the Patriotic summer holidays.

I purchased some burlap with red,blue and silver accents from Michaels, a straw wreath form, colored felt and some mini pinwheels. I used a paper star I already had and some pins to attach the pieces of the wreath together.


I wrapped the straw wreath form in the plastic it came wrapped in, and that helps it not fall apart.  I then followed the instructions from the The Crafted Sparrow to add the felt pieces. Here was my pile of them after I cut them out. I was not too worried about the them being the same perfect shape. I need to cut them out quickly.
 I then let Wynn decorate a paper star for me to add. She decided to draw the blue and red lines around the edges. I thought it looked very good for a four year old. Then I took a part a pinwheel from the stick it came with and put it in with a pin.

Thanks for stopping by today!  Enjoy your week.

Monday, April 7, 2014

Burlap Egg Craft & Spring Mantel


I apparently cannot get enough of the burlap canvases at Michaels. I made this simple project for my spring mantel at my girls craft night. I went with the same concept of my burlap monogram. It was fun and easy to do.


I layered a piece of scrapbook paper and a doily using spray adhesive. Then I cut out a circle shape from a moss mat I purchased from Hobby Lobby. I topped that off with a blue robin's egg. I am making one of these for each of Wynn's teachers for Easter too. 


It looks cute with my Easter decorations on my mantel this spring. I have my Easter Printable I shared up there along with my Spring Wreath I shared last year. I paired my new Egg Burlap piece with a wooden bunny from the Etsy Shop by Amy at  While Wearing Heels. I love it!


It is finally beginning to feel like spring here in Maryland, and so this mantel finally feels appropriate. Hopefully we are done with the snow. Enjoy your day!

Monday, March 3, 2014

Burlap Monogram Sign

I could not just make one burlap monogram present apparently. I made this one for my mother in law. I figure everyone could use something bright in their home during all these dreary winter days we have been experiencing lately. Is it spring yet?  


I picked up the burlap canvas at Michaels and a large pad of scrapbook paper on clearance. I already had the wooden V in my collection. I painted the letter with a mixture of gold and pink paint.  I used spray adhesive to attach the scrapbook paper to the canvas, and then hot glue to attach the wooden letter.

I think I may have to go and get another canvas to make one for myself. Thanks so much for stopping by today.


Monday, February 24, 2014

Burlap Monogram


One of my favorite people in the world is my Aunt. She is so kind and always thinks of others. I thought since I would be seeing her soon that I would make something forher for spring.  I had purchased a burlap canvas a few weeks back at Michaels, and knew I would use it soon. After seeing all the beautiful Hometalk Michaels Pinterest Party projects that were shared last week I decided to get to work on my own project.


All the materials I used in this project were from Michaels. I used spray adhesive to attach the turquoise burlap that I bought in a roll for $2.99.  The burlap canvas was $8.99 on sale.  It is approximately 16 inches long.  Then I took the chalkboard tag that I bought in a set of four colors and wrote the year of their wedding anniversary on it. The tags were about $.75 each on sale in a pack of four.   I painted the wooden "M" that was around $3 in some tan paint I already had. I glued on a fabric flower from my craft collection and attached a simple jewel I bought on clearance from Michaels last year.  

Thanks so much for stopping by! Enjoy your week.


59866249e0891e0c4ddc55363de2ccb7b8e75a235f06a16d47

Tuesday, September 10, 2013

Spider Halloween Wreath

I've been pinning a lot of wreath ideas on Pinterest lately. I had never made a Halloween wreath before, and thought I'd give it a whirl this year.  I used the following materials for this wreath in particular:

  • a straw wreath from Hobby Lobby
  • leftover ivory burlap from my stash
  • chevron burlap from Hobby Lobby
  • a glitter spider from Michaels
  • a piece of cardboard
  • chalkboard vinyl from Michaels
  • chalk

I wrapped the straw wreath form first in the ivory colored burlap. I wanted to originally wrap it only in the the chevron burlap, but I realized that I would use the entire roll up with one wreath. I wanted to have the option to use the chevron for other projects.  Then I wrapped the wreath every inch or so with the chevron burlap strips.
I cut apart one of my many Amazon boxes, and then wrapped that in chalkboard adhesive vinyl. I attached the cardboard/vinyl piece with some hot glue to the back of the wreath.
Finally I added a little spider with a clothespin attached to it onto the wreath. I was glad I didn't have to glue it. I think I will be able to make this wreath work for another holiday down the road by taking off the spider and erasing the center . Then I draw a quick web with some chalk to make it even more ready for Halloween.
Thank you so much for stopping by today!

Thursday, April 4, 2013

Personalized Cork Board

I picked up a magnetic cork board at Jo-Ann's last week for around $8 with my coupon.  I wasn't sure what I was going to exactly do with it. But, I had never seen one before. I am probably just out of the loop there.  


Then I figured I would make this for my friend for a just because gift.  I took the magnets that came with the cork board and added some burlap rosettes I made.  I took the piece of burlap I removed when cutting it and adhered it to the top. Then I cut out some small pennant shapes from a fabric piece I had lying around. I knew she would like the olive green color because she chose that as a paint color in her home.
I cut out a "B" on my Silhouette and placed it on the board along with the rosettes. I also added a strip of lace along the bottom of the board. I was happy with how this turned out. The total cost was around $8.00, because I already had the other materials in my craft stash.
My friend really liked it and I was happy to make it for her.  I'm running out of wall space in my house or I would make another cork board for me!

Thanks for stopping by!

Thursday, December 6, 2012

Burlap Wreath

Maybe after the holidays I will get off my letter kick. I just cannot seem to stop using them in my craft projects. I am all about having easy and cost effective holiday gifts. I made this easy wreath for my mother-in-law. Don't worry she will not see it on my blog.  I grabbed a wire wreath, mod podge,  1.5 wired burlap ribbon from Amazon, a paper mache V from Hobby Lobby, furniture tacks from Jo-Ann's, and a piece of scrap fabric that I had gotten at Jo-Ann's for another project.


I simply cut the strips of burlap and twisted them around the metal wreath form.  It was quick and easy. I did it during a episode of Mickey Mouse Clubhouse. You can tell I really need a distraction while watching that. Then I mod podged the fabric that I cut to the paper mache letter, which I did later on while watching Top Chef.  I am trying to get a lot done during television shows. Once it was dry I attached the tacks to the letter.  

The total cost for this wreath was approximately $30, which was much less expensive than the wreaths I had my eye on in the Etsy shops I had checked out.

Thanks for stopping by!

Megan


Sharing at:

Monday
Alderberry Hill
The Gunny Sack
The Dedicated House
Adventures of a DIY Mom 
Home Stories A to Z
Todays Creative

Tuesday
Uncommon Designs
A Diamond in the Stuff
Elizabeth & Co
Romance on a Dime
The NY Melrose Family
The DIY Dreamer
Claiming Our Space
The Winthrop Chronicles
Full Circle Creations

Wednesday
Southern Lovely
We Like To Learn As We Go
The Shabby Creek Cottage
Someday Crafts
High Heels & Grills

Thursday
The Taylor House
At The Picket Fence
Live Laugh Rowe
A Glimpse Inside
Seven Alive
52 Mantles
Fireflies and Jellybeans
Bloom Designs
House of Hepworths
Momnivores Dilemma
Western Warmth
Saving 4 Six

Friday
One Project Closer
504 Main
Redoux Interiors
Craftionary
The Grant Life
Just Us Four
Thrifty Handmade Days
Tatertots & Jello
Fresh Eggs Daily

Saturday

Too Much Time On My Hands
Tutus and Tea Parties
Classy Clutter
Its Overflowing

Sunday

Nifty Thrifty Things
Flamingo Toes
Twigg Studios
C.R.A.F.T.
My 1929 Charmer
Brassy Apple 

Tuesday, December 4, 2012

Holiday Banner by Amy

I made a holiday banner last year to use in our Christmas card and completely forgot about it until I pulled out all of our holiday stuff. I knew I could find use for it this year. I used burlap fabric, traced out the pattern I printed off the computer then cut our letters from construction paper and glued then onto the burlap banner.

This was our Christmas card last year.


Thanks for stopping by!

Amy


Sharing at:
Monday
Alderberry Hill
The Gunny Sack
The Dedicated House
Adventures of a DIY Mom 
Home Stories A to Z
Todays Creative

Tuesday
Uncommon Designs
A Diamond in the Stuff
Elizabeth & Co
Romance on a Dime
The NY Melrose Family
The DIY Dreamer
Claiming Our Space
The Winthrop Chronicles
Full Circle Creations

Wednesday
Southern Lovely
We Like To Learn As We Go
The Shabby Creek Cottage
Someday Crafts
High Heels & Grills

Thursday
The Taylor House
At The Picket Fence
Live Laugh Rowe
A Glimpse Inside
Seven Alive
52 Mantles
Fireflies and Jellybeans
Bloom Designs
House of Hepworths
Momnivores Dilemma
Western Warmth
Saving 4 Six

Friday
One Project Closer
504 Main
Redoux Interiors
Craftionary
The Grant Life
Just Us Four
Thrifty Handmade Days
Tatertots & Jello
Fresh Eggs Daily

Saturday
Too Much Time On My Hands
Tutus and Tea Parties
Classy Clutter
Its Overflowing

Sunday
Nifty Thrifty Things
Flamingo Toes
Twigg Studios
C.R.A.F.T.
My 1929 Charmer
Brassy Apple 
This Gal Cooks